Quickstart for merchants
Get a FiberGate deployment running in three commands. The scaffolding wizard writes every config file and generates every secret for you, so you never hand-edit an env file or copy-paste a hash.
New here? What is FiberGate? explains the pieces in two minutes. Want the full journey (dashboard tour, first invoice, a live payment)? That's the Merchant walkthrough — this page is just the fast path to a running gateway.
What you'll need
- Docker (with Compose) on the machine that will host the gateway.
- A CKB testnet signing key for your Fiber node, plus a bit of testnet CKB to fund it — grab funds from the faucet. (Unsure what any of this means? See the Glossary.)
- Node.js on the machine where you run the wizard. It can be your laptop — the deploy host itself only needs Docker (see Manual / advanced deployment if they're different machines).
Run it
npx create-fibergate@latest fibergate-deploy
cd fibergate-deploy
docker compose up -d
That's a working local/testnet deployment.
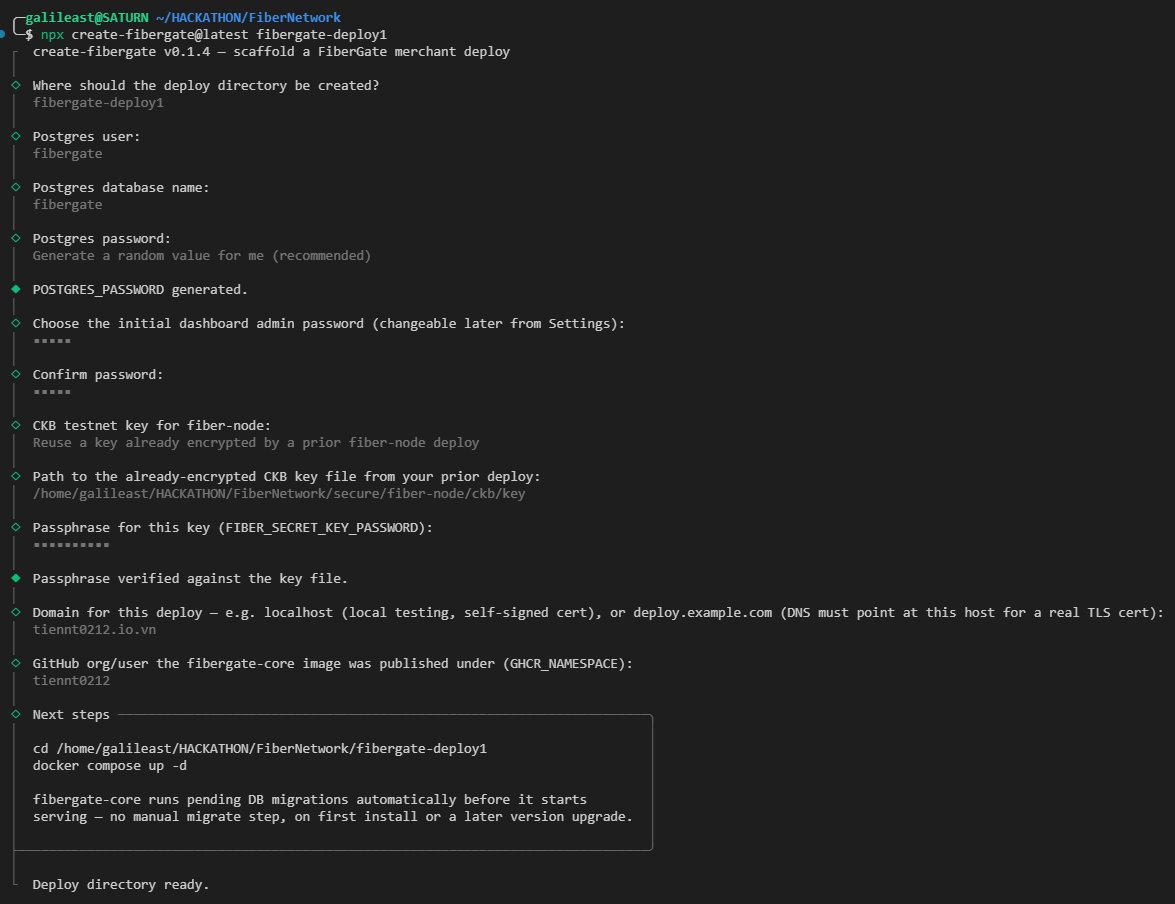
What the wizard asks
It's a short interview, and it never sends anything over the network:
- Postgres credentials — a database user, name, and password (it can generate the password).
- Your dashboard admin password — hashed locally, never transmitted.
- Your CKB testnet signing key — either point it at a fresh raw-hex key to encrypt, or reuse an already-encrypted key from a previous deploy (its passphrase is checked offline before anything is written to disk, so a typo fails right here instead of as a container crash later).
- Your domain and the GitHub namespace the
fibergate-coreimage is published under.
Everything else — the internal API secret, the webhook encryption key, the session secret — is generated for you and written into .env. You don't invent or manage any of it by hand.
Which secrets does it generate, and what for?
| Secret | Purpose |
|---|---|
FIBERGATE_INTERNAL_SECRET | The API key your storefront uses to call FiberGate. |
WEBHOOK_SECRET_ENCRYPTION_KEY | Protects stored webhook secrets at rest. |
DASHBOARD_SESSION_SECRET | Signs your dashboard login session cookie. |
Full reference for every variable: Environment variables.
Once the interview is done, it writes a ready-to-run docker-compose.yml, a filled-in .env, and a .gitignore into the target folder — using the published fibergate-core image, so there's no repo to clone. Then docker compose up -d brings everything up, and fibergate-core runs its database migrations automatically before it starts serving — on first install and on every later upgrade.
After it's up
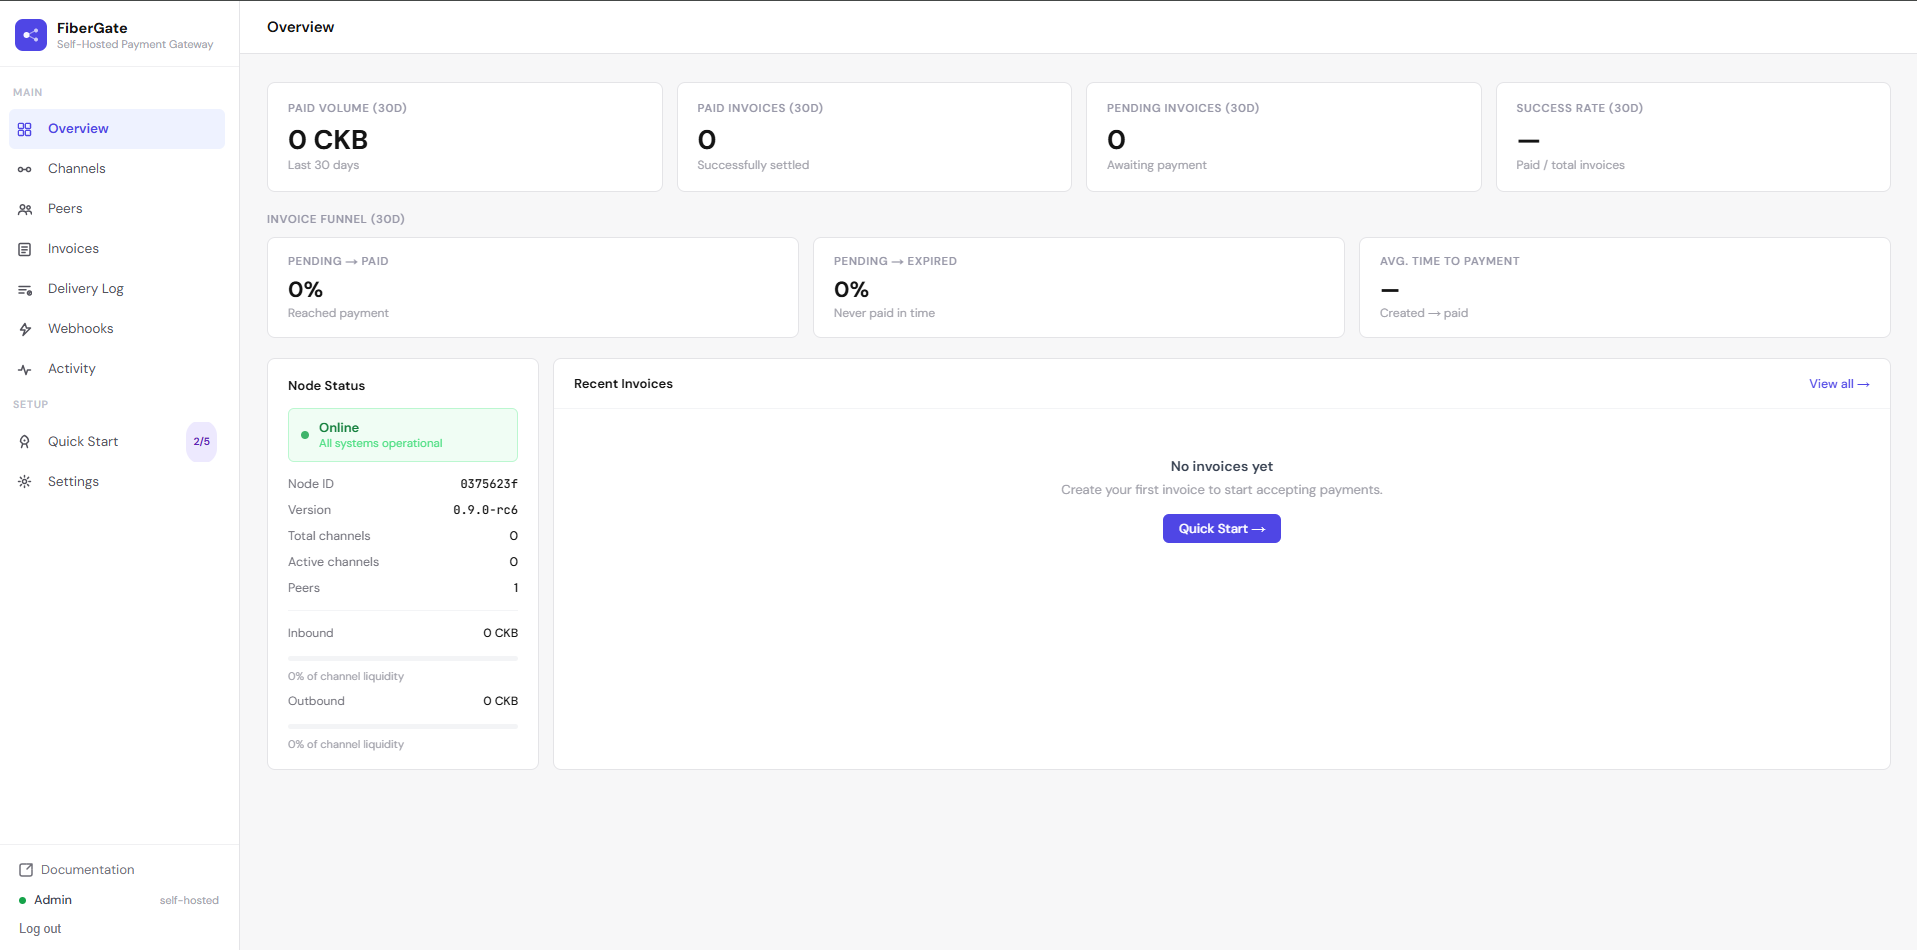
- Open the dashboard at
http://<your-host>:3000(orhttps://<your-domain>once you've done public HTTPS setup) and log in with the admin password you just set. - Create your first invoice — the easiest way is
@fibergate/sdkfrom your storefront; the walkthrough shows it in a few lines, or see the API Reference to call the REST endpoint directly. - Register a webhook from the dashboard to get notified the moment an invoice is paid.
Upgrading
Upgrading is the same command: docker compose up -d. The image is configured to always check for a newer build first, and migrations run themselves on boot, so there's no separate pull or migrate step.
Pinning to a specific build
By default you track :latest. To pin a reproducible build instead, set FIBERGATE_CORE_TAG in .env to a specific sha-… tag; docker compose up -d then stays on that build until you change the pin yourself. See Manual / advanced deployment.
Something not covered here?
- Want a public HTTPS domain for customers or judges to reach? → Public HTTPS deploy
- Want full manual control of the generated files, or Node.js isn't on the deploy host? → Manual / advanced deployment
- Want to see a real merchant integration end to end? → Demo storefront
- Something failed during setup? → Troubleshooting