Merchant walkthrough: from zero to your first payment
This is the whole journey in one page — deploy FiberGate, log in and look around, create your first invoice from code, wire up a webhook, and then watch a real payment land in real time. Follow it top to bottom the first time; afterwards it doubles as a map of where each feature lives.
New to the concepts (node, channel, invoice, webhook)? Skim What is FiberGate? first — it takes two minutes.
What you'll need
- Docker (with Compose) on the machine that will run the gateway.
- A CKB testnet signing key for your Fiber node, and a little testnet CKB to fund it (from the faucet).
- Node.js on the machine where you run the scaffolding wizard (that can be your laptop — it doesn't have to be the deploy host).
Step 1 — Scaffold and boot
The scaffolding wizard writes every config file and secret for you, so you never hand-edit an env file. From a machine with Node.js:
npx create-fibergate@latest fibergate-deploy
cd fibergate-deploy
docker compose up -d
The wizard walks you through Postgres credentials, your dashboard password, your CKB key, and your domain. For a blow-by-blow of each prompt, see Quickstart for merchants.
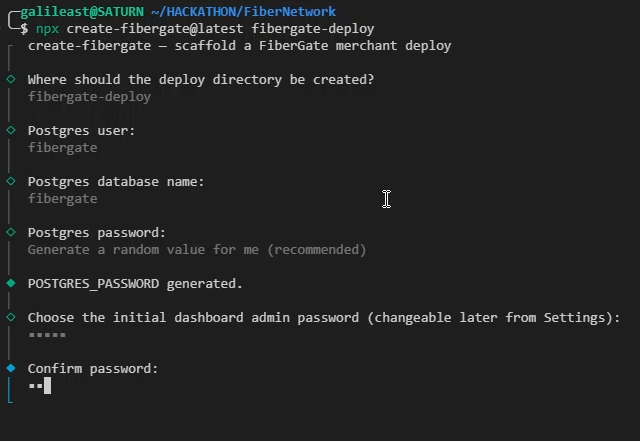
Give the containers a minute to pull and start, then check they're all up:
docker compose psYou're looking for postgres, fiber-node, and fibergate-core all reporting healthy.

What's actually running?
Six services boot together: your Fiber node (on CKB testnet), PostgreSQL, fibergate-core (the dashboard + API), and nginx + certbot handling TLS out front. A couple of one-shot "preflight" containers check your key and certs first, then exit. Only nginx is exposed publicly — everything else talks over a private Docker network. The Architecture page has the full diagram.
Step 2 — Log in and get oriented
Open the dashboard — http://<your-host>:3000 locally, or https://<your-domain> once you've done the public HTTPS setup — and log in with the admin password you chose during scaffolding.
You land on Overview: a live snapshot of paid volume, pending invoices, your success rate, and your node's health (channels, peers, and how much you can send and receive).
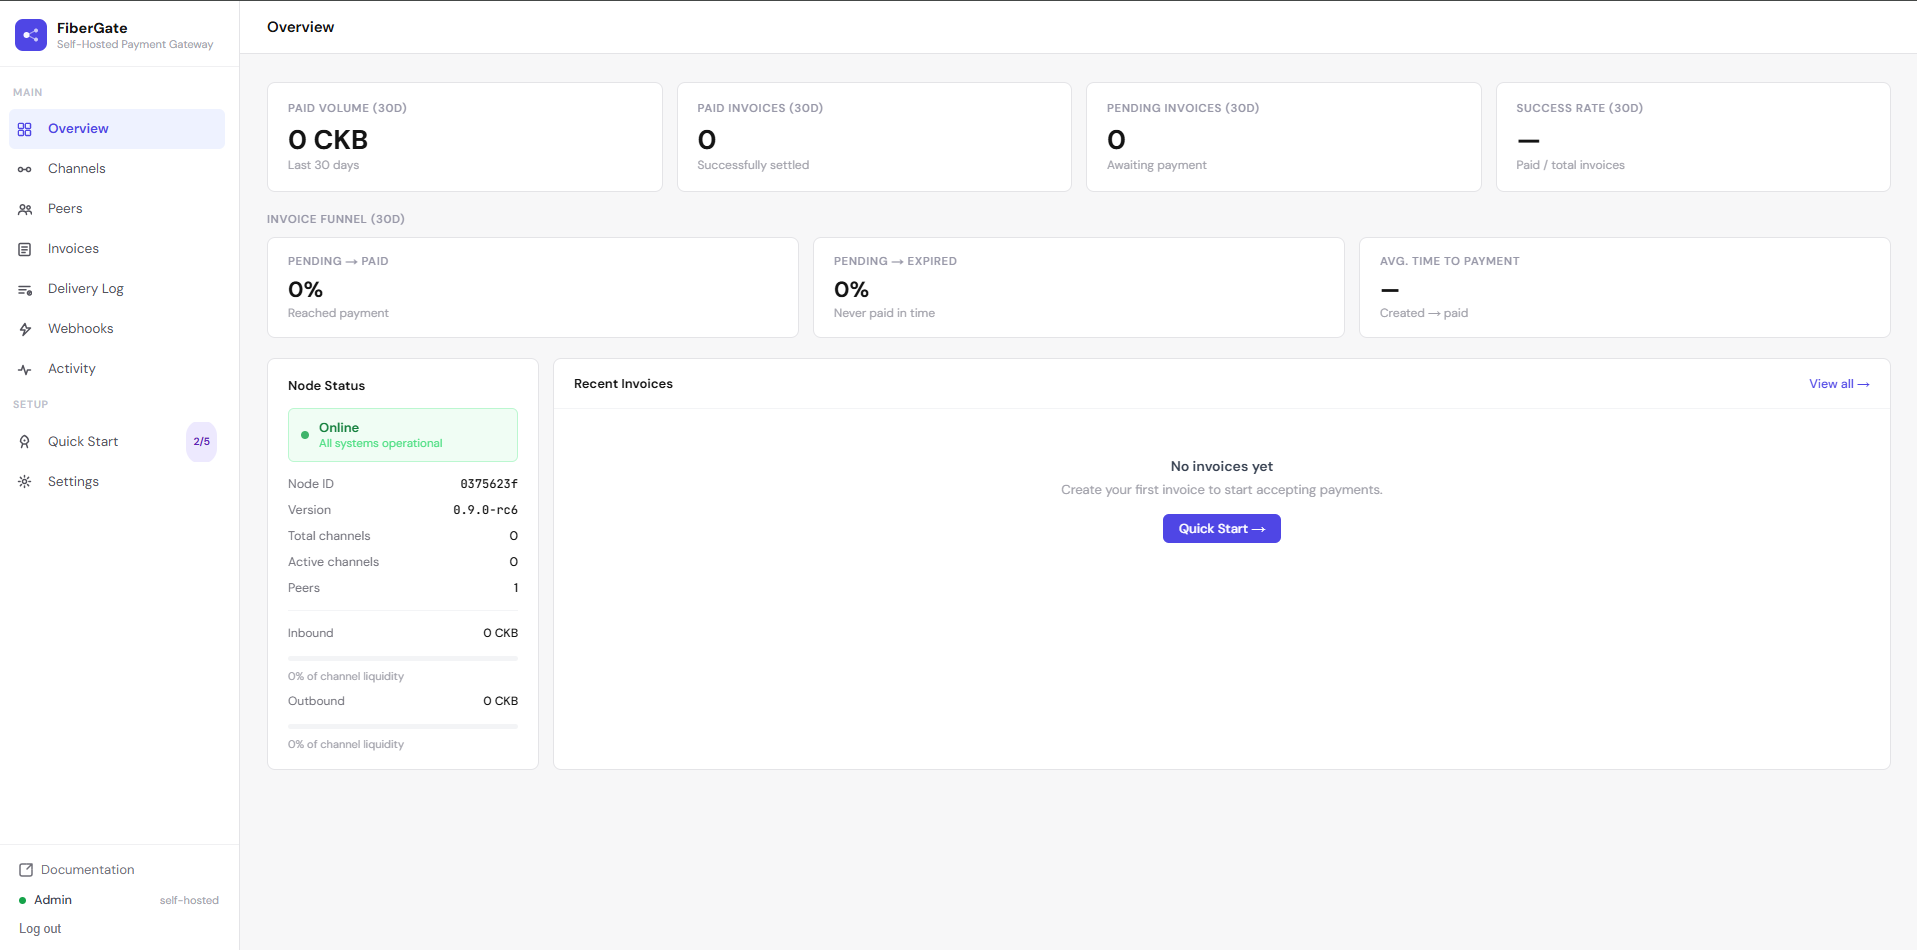
Take a moment to click through the sidebar — Invoices, Channels, Peers, Webhooks, Delivery Log, Activity. The Dashboard tour explains what each page is for; you'll use several of them below.
The dashboard also has a built-in Quick Start checklist (top of the sidebar, showing "N/5") that tracks these same steps against your real data — a handy second copy of this walkthrough.
Step 3 — Create your first invoice
Invoices are created from your code, not by hand in the dashboard — that's the whole point of the gateway. The easiest way is the official SDK.
Install it in your storefront project:
npm install @fibergate/sdkThen create an invoice server-side. Point the client at your deployment and authenticate with the shared API secret the wizard generated for you (it's in your .env as FIBERGATE_INTERNAL_SECRET):
import { FiberGate } from "@fibergate/sdk";

const gateway = new FiberGate({
  // FIBERGATE_BASE_URL is your deployment's root URL, e.g. http://localhost:3000
  baseUrl: `${process.env.FIBERGATE_BASE_URL}/api/v1`,
  internalSecret: process.env.FIBERGATE_INTERNAL_SECRET!,
});

const invoice = await gateway.invoices.create({
  amount: 2.5,
  asset: "CKB",
  description: "Order #1234",
});

// Hand invoice.invoice_address to the customer — a Bech32m string they pay
// from any Fiber wallet. Render it as text or a QR code.
console.log(invoice.invoice_address);
That's the same call any merchant makes. The invoice_address it returns is what the customer pays; everything after that, FiberGate tracks for you.
Prefer plain HTTP, or another language?
The SDK is a thin wrapper over one REST endpoint. The equivalent call:
curl -X POST http://localhost:3000/api/v1/invoices \
  -H "Authorization: Bearer $FIBERGATE_INTERNAL_SECRET" \
  -H "Content-Type: application/json" \
  -d '{"amount": 2.5, "asset": "CKB", "description": "Order #1234"}'
Full request/response and error shapes are in the API Reference.
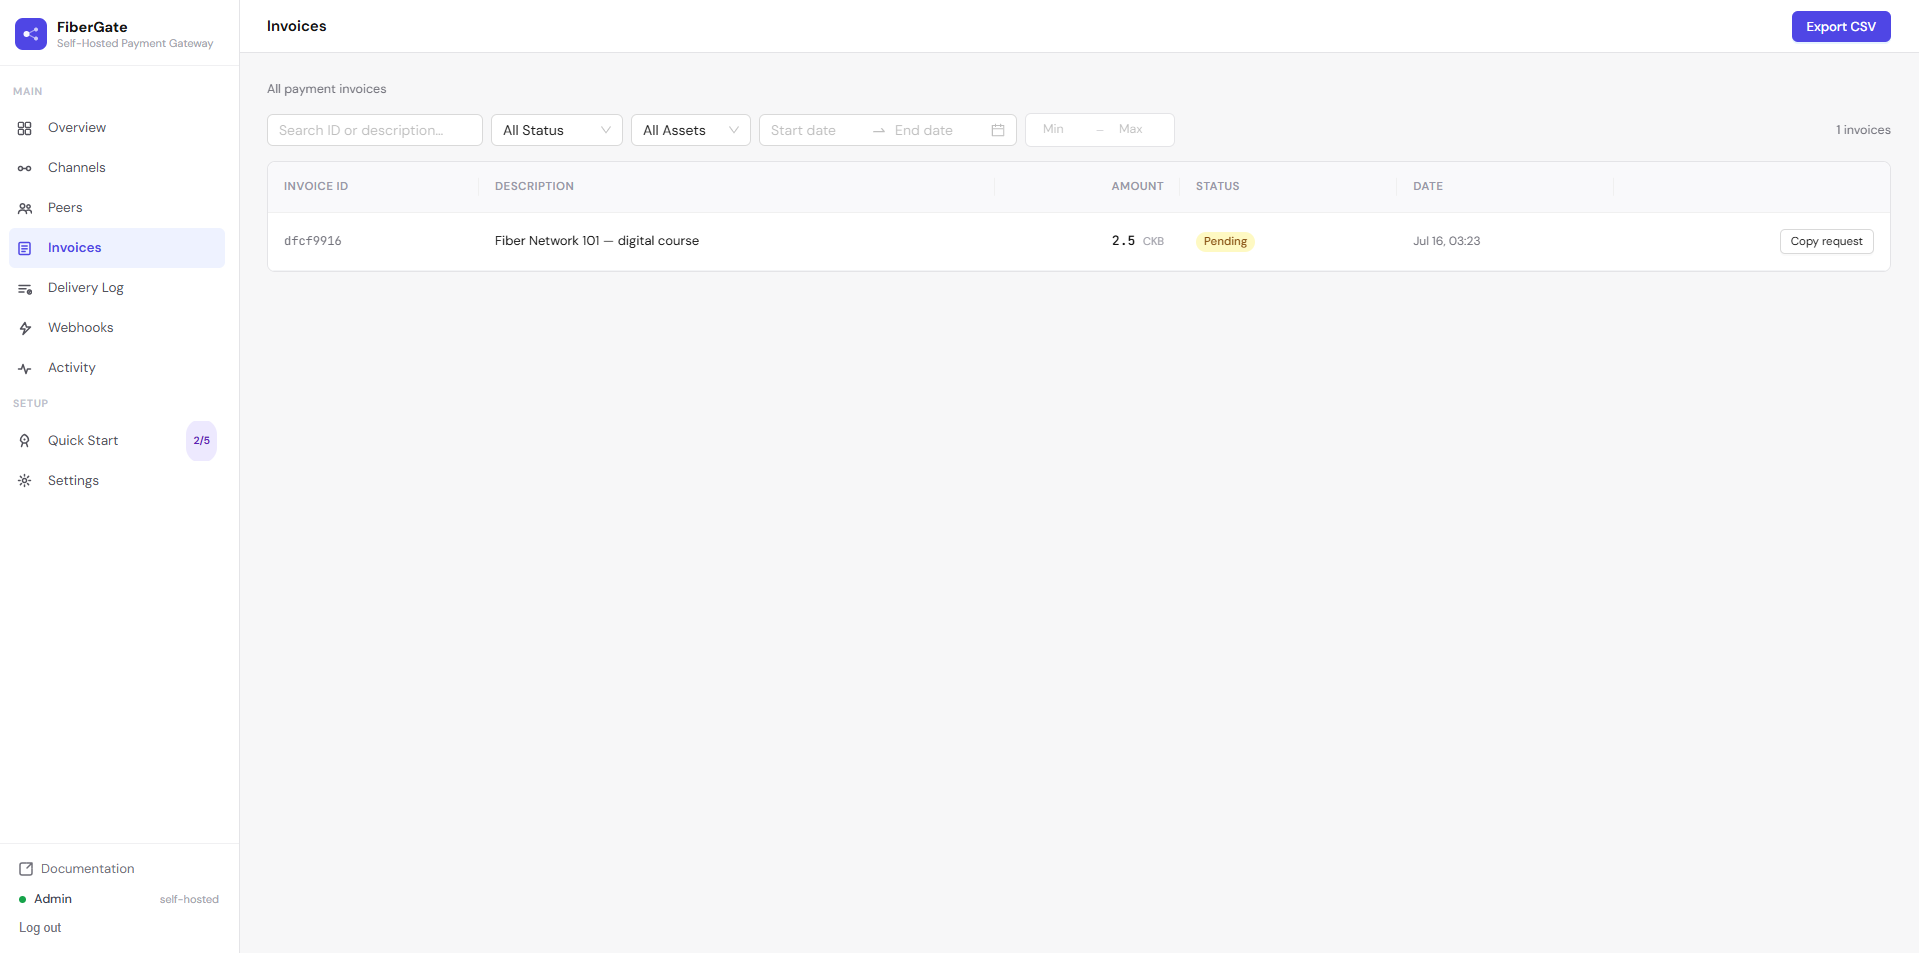
The new invoice shows up immediately in the dashboard under Invoices, marked pending.
Step 4 — Get notified when it's paid
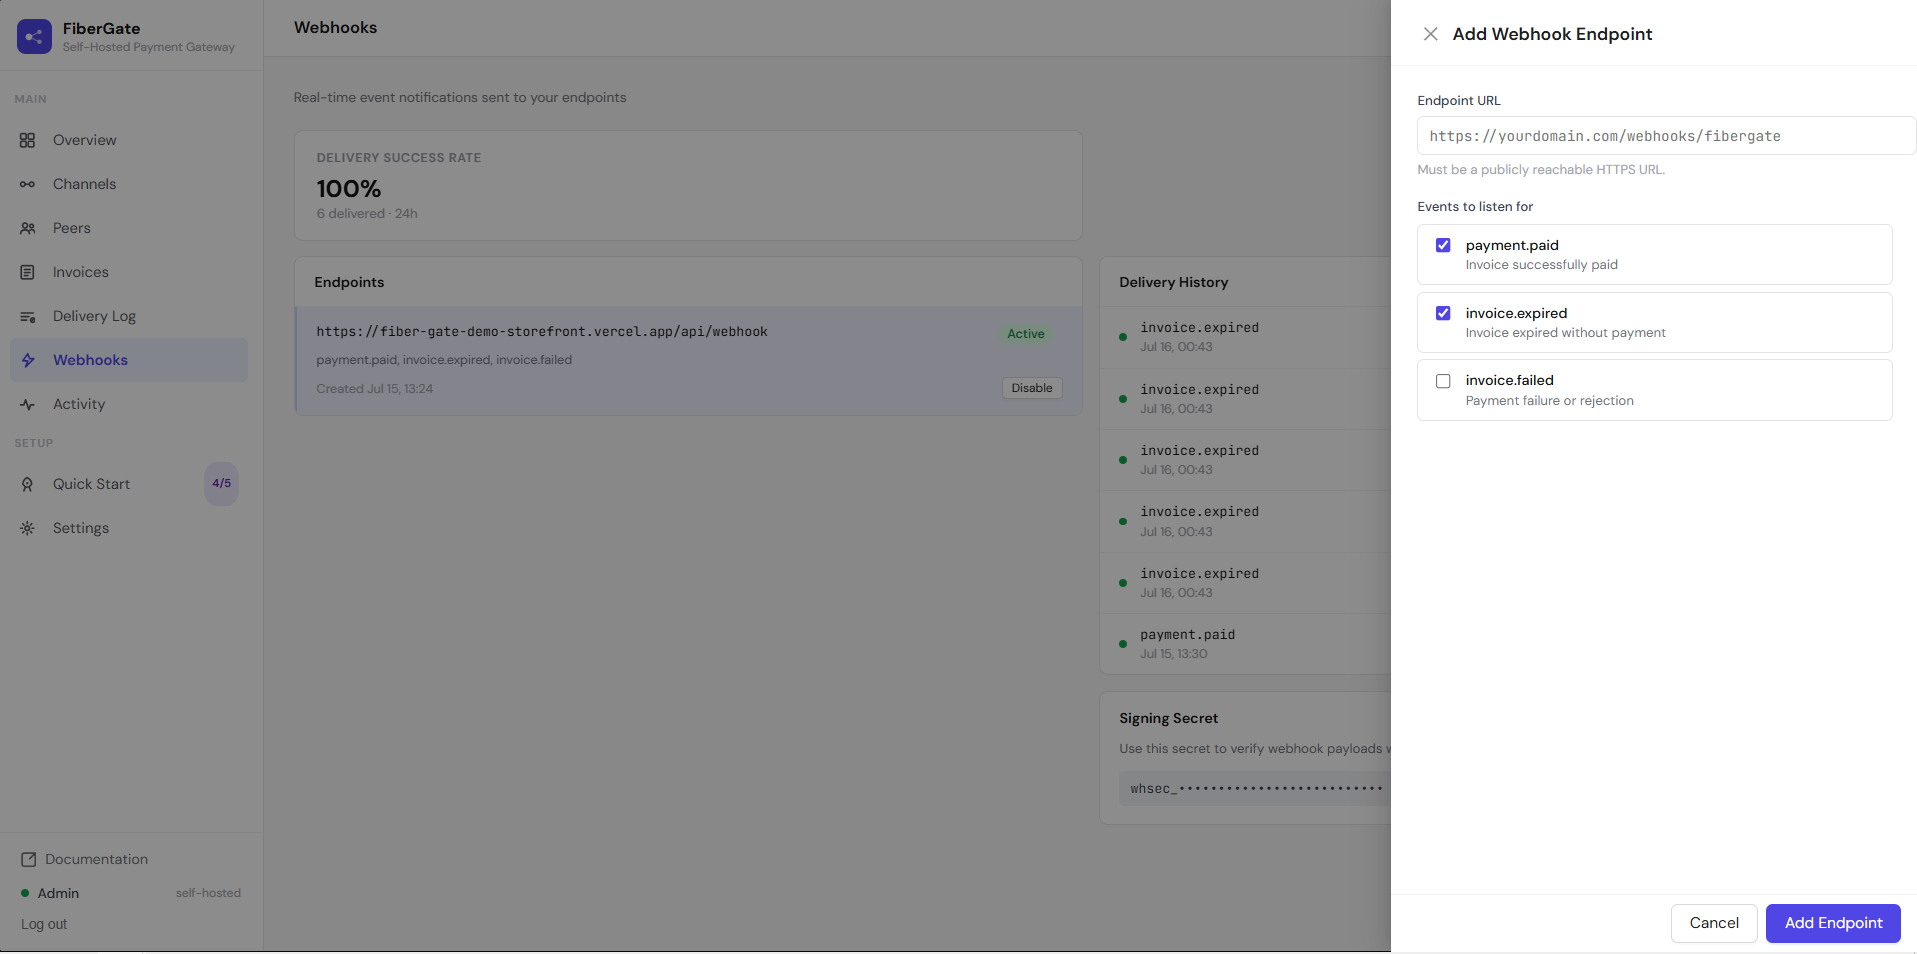
Polling the API for status works, but the better pattern is a webhook: FiberGate calls your URL the instant an invoice changes. Set one up from the dashboard.
- Go to Webhooks → Add Endpoint.
- Enter your store's receiving URL (must be
https://) and tick the events you care about — start with payment.paid. - Save. FiberGate shows you a signing secret exactly once — copy it now; you can't see it again (only regenerate it).
In your webhook handler, verify every request with that secret before trusting it. The SDK ships the check:
import { verifyWebhookSignature } from "@fibergate/sdk";

// rawBody is the exact bytes received, BEFORE JSON.parse()
const ok = verifyWebhookSignature(
  rawBody,
  request.headers["x-fiber-signature"],
  process.env.MY_WEBHOOK_SECRET!,
);
if (!ok) return new Response("bad signature", { status: 400 });
When an invoice is paid, FiberGate POSTs a small JSON body (event, created_at, and a data object with the invoice id, amount, and your metadata). If your endpoint is down, it retries — see the Delivery Log in Step 6.
Step 5 — See it live
Here's the satisfying part: watch a payment settle end to end, with the dashboard and storefront updating themselves — no refresh, no polling.
The repo ships a demo storefront — a small, genuinely separate app that integrates exactly like a real merchant would (SDK invoice, QR code, signed webhook, live update over Server-Sent Events). Use it to see the whole loop without building a store first.
Run the demo storefront and point it at your gateway. Setup is in Demo storefront — it needs only your base URL, the API secret, and the webhook secret from Step 4.
Open a payment page — click Buy now. The storefront creates an invoice and shows its QR code with a countdown.
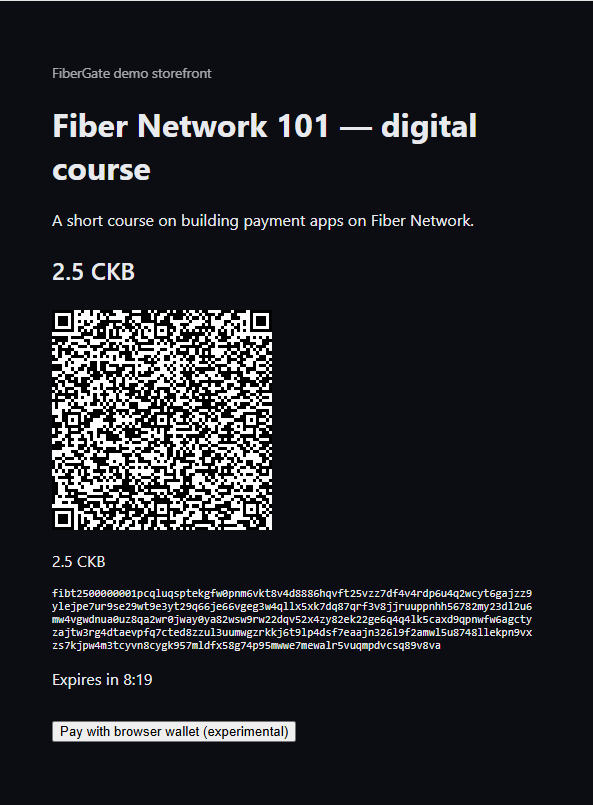
Pay it. Any Fiber testnet wallet with an open channel to your node works. If you don't have one handy, the repo includes a throwaway "payer" node just for this — see Paying a demo invoice locally.
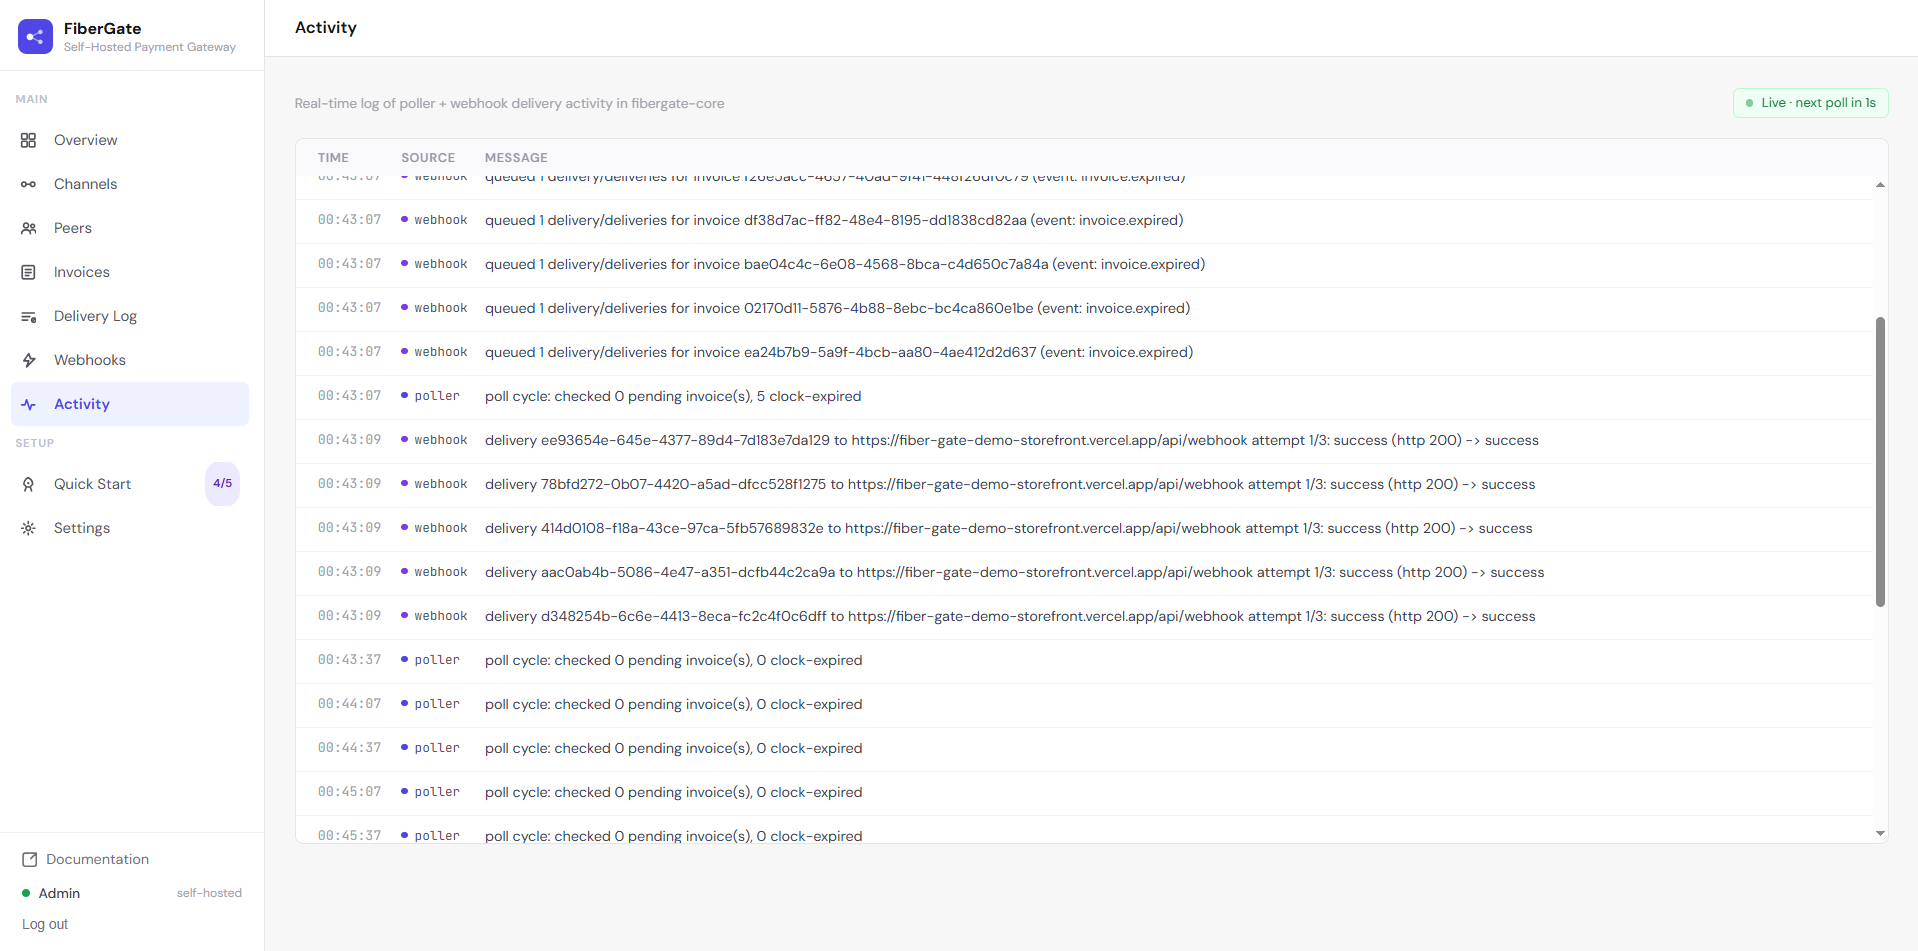
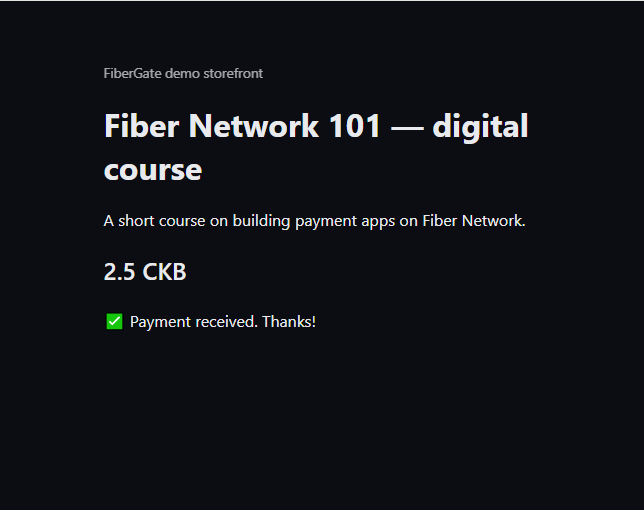
Watch it land. The moment your node settles the payment, the dashboard's Activity feed logs the event and the storefront flips to Payment received on its own.
Why is this instant, and not every 30 seconds?
fibergate-core holds a live WebSocket subscription to your node's store-changes stream, so it hears about a settlement within seconds. The 30-second interval poller is still there as a fallback in case that stream drops. The storefront, in turn, gets pushed the update over Server-Sent Events the moment its webhook fires. (Details in Decisions & trade-offs.)
Note the payer node is a local-testing convenience, not part of a real merchant deploy — in production your customers pay from their own wallets.
Step 6 — Audit what happened
Every payment leaves a full paper trail in the dashboard.
Invoices → open any row for a Receipt drawer: the full invoice detail plus that invoice's webhook delivery history, with a download button.
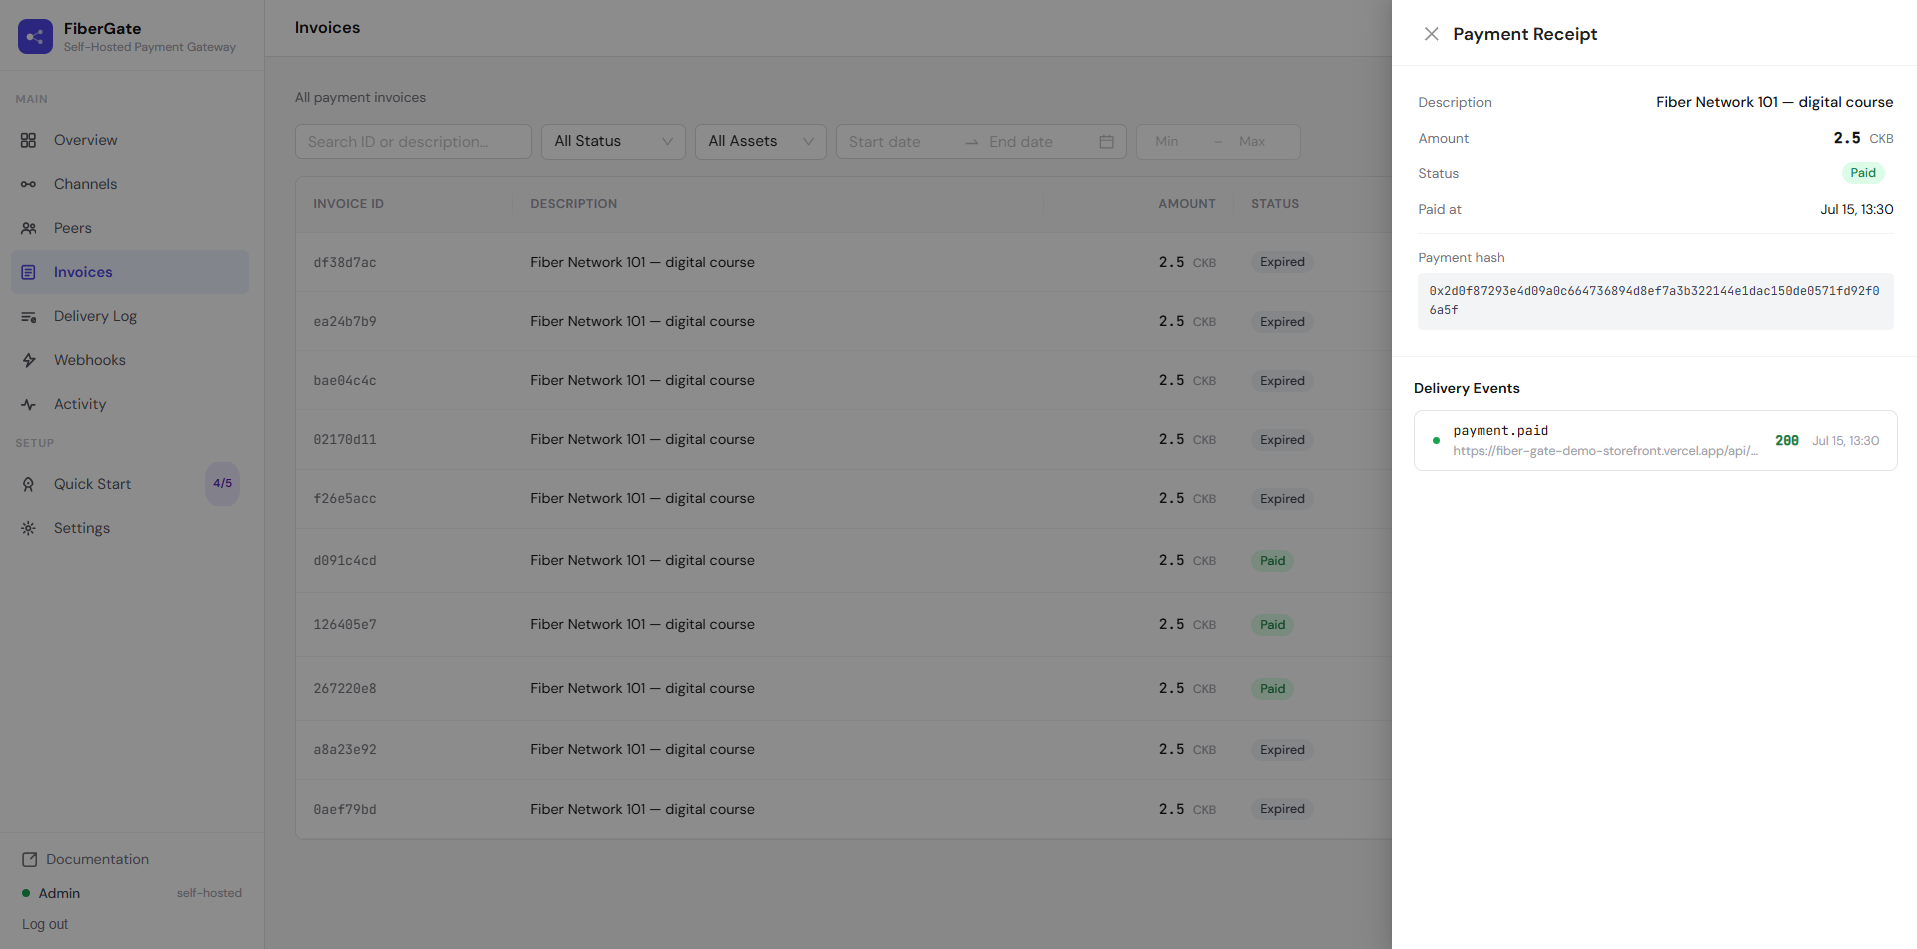
Export to CSV from the Invoices page. The export respects whatever filters and search you currently have applied, so you can pull exactly the slice you want.
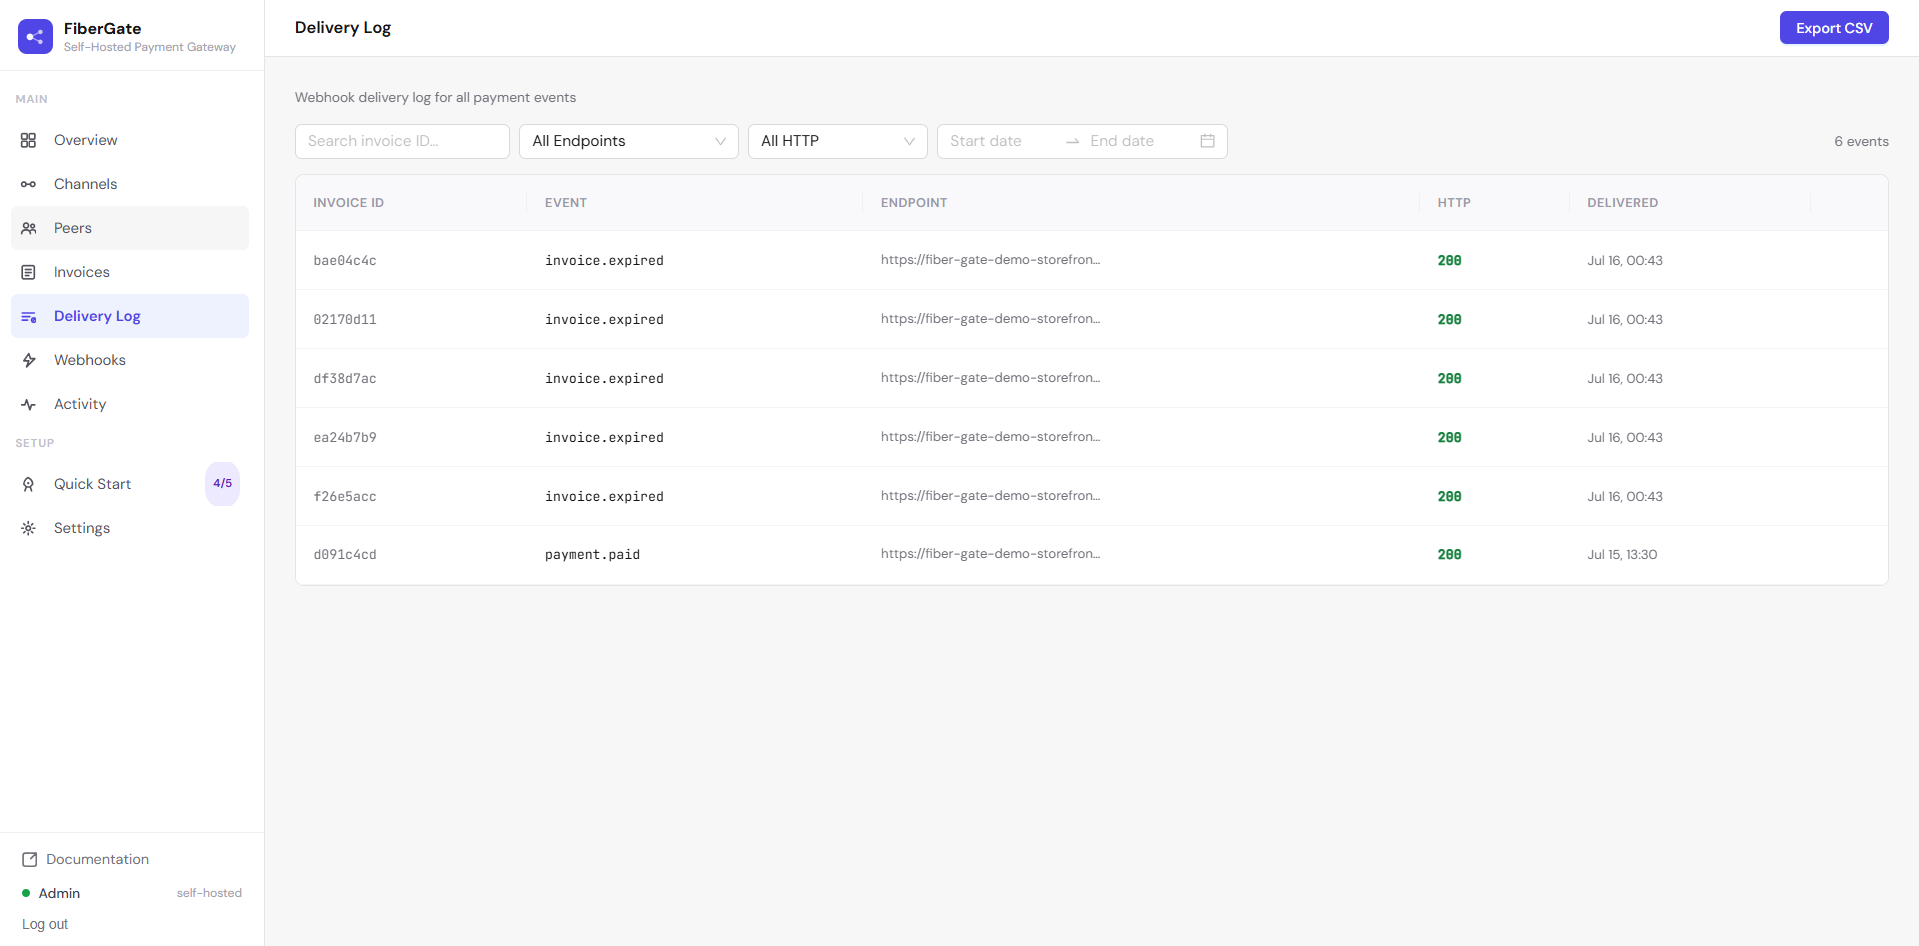
Delivery Log shows every webhook attempt across all endpoints — status, response, signature, and retries — so you can confirm exactly what your store received (and retry a failed one by hand).
You're done — what next?
- Put a real domain in front of it → Public HTTPS deploy.
- Browse every dashboard page in detail → Dashboard tour.
- Read the full API and webhook payloads → API Reference.
- Hit a snag anywhere above? → Troubleshooting.